


Over the next few months, in our WindTalkers column, we will be covering basic woodwind repair skills for saxophone, clarinet and flute. Our hope is to help you improve your knowledge to help your students become more aware of their abilities and the requirements for their instruments. If you are interested in taking it a step farther be sure to check out the Wind Repair Training Academy. (WindRepairTrainingAcademy.com). I am one of the teachers at the Academy.
Essential Saxophone Repair Skills Every Band Director Should Know
As a band director, you’re not just the leader of the ensemble. You’re also often the first line of defense when it comes to keeping instruments in playing condition. While you might not be expected to possess the deep technical knowledge of a professional repair technician, having a basic understanding of saxophone repair can be a game-changer for the smooth functioning of your program. The saxophone, like all wind instruments, is a delicate and intricate piece of machinery. Its numerous pads, springs, rods, and key mechanisms work together to produce a smooth, clear sound. However, wear and tear is inevitable, and saxophones are particularly prone to certain issues due to their complex construction and the unique demands placed on them by student players. Here are the fundamental skills every band director should be familiar with when it comes to saxophone maintenance and repair:
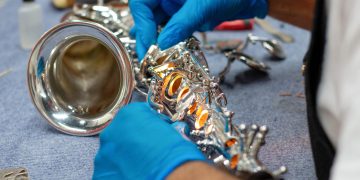
A saxophone that isn’t sealing properly is an instrument that simply won’t play well, and it often leads to poor intonation or a fuzzy sound. Leaks usually occur when pads no longer create a complete seal over the tone holes. When a pad is damaged or worn out, air leaks through the gaps, reducing the instrument’s overall efficiency.
How to Diagnose Leaks: To check for leaks, use a ‘leak light’ – These can be simple, inexpensive LED strips or dedicated leak lights. Insert it into the instrument and while closing each key, look for light shining through, if there are leaks in the pads it will be obvious. There is a difference between pad leaks, and timing or adjustment leaks when two or more keys are supposed to close together. When checking for leaks try to do it one key at a time, and if there is a corresponding timing/adjustment leak. Press down on that pad with one hand, and then use your other hand to check the individual pad.
Springs
Springs control the movement of the saxophone’s keys, and over time, they can become weak or misaligned, causing keys to stick or not close fully. This issue typically manifests as keys that don’t pop back up when pressed. One of the most common things I have seen is springs that have just popped off their spring catch and the musicians just don’t notice it, often, just using a spring hook to put it back in place fixes many problems.
How to Fix It: While it’s often a good idea to leave spring replacements to the pros, a quick adjustment to a misaligned spring can often be done in a pinch. To adjust a spring, use a pair of needle-nose pliers to gently bend the spring to its correct position. This requires a delicate touch, as too much pressure can snap the spring or damage the surrounding components. Keep in mind that if the saxophone’s action is particularly sluggish or difficult, it might not be just the springs at fault—it could also be a combination of pads, rods, and alignment issues. So, if spring adjustments don’t fix the issue, don’t hesitate to get a more thorough professional evaluation.
Cleaning and Basic Maintenance
Regular cleaning and maintenance can prevent many of the problems mentioned above from occurring in the first place. Ensure your students wipe down their instruments after every use to remove moisture and oils that could damage the pads. Use a soft cloth for the body of the instrument, and a swab or pull-through for the neck and body tube. You can also get ‘pad dryers’ which is a small piece of microfiber cloth that helps to dry out pads individually. You can also get a product called ‘Key Leaves’ which prop open the Eb and C# keys, which subsequently opens the G# Key and will help the instrument to air out and help reduce that common ‘Sticky G#’.
Encourage students to check all their screws on their saxophone, especially the key guards as they can sometimes come loose from regular playing. I like to check all the screws on my saxophone at least once a month and gently tighten any screws that may back themselves out. If you go too far and the key no longer works, just a half turn backwards will solve that problem, most of the time, the screws will just naturally stop. It is also very important to use an end plug on a Saxophone every time it goes in the case. Many people just leave them sitting in the case and never use them. The end plug is important to ensure the instrument stays securely in the case and doesn’t move in transit and keeps the octave key from getting damaged.
Final Thoughts
While saxophone repair may seem like a daunting task at first, learning these basic skills will give you the confidence to troubleshoot common issues and ensure that your students have reliable instruments for their musical journey. With a little practice and attention to detail, you’ll be able to keep your saxophones in working order, and your students’ music-making uninterrupted. After all, your role as a band director is about more than just teaching music—it’s about nurturing the instruments that bring that music to life.
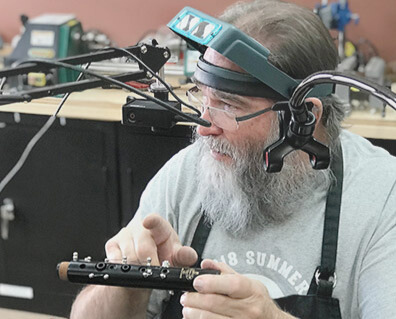
Check out our video of Bruce Marking, former head of woodwind repair for Buffet Crampon, explaining some basic tips and tricks to help give you some more ideas of ways to maintain a saxophone.
https://www.youtube.com/watch?v=pP1n0GqbKOE


